Tunisian Crochet Beanie
More patterns. YAY! This is my number one favorite hat pattern. It is completely my original design. This is made in Tunisian Crochet, don't be intimated, the stitch is very simple to learn and makes a really thin dense fabric that is perfect for hats.Tunisian Crochet Beanie
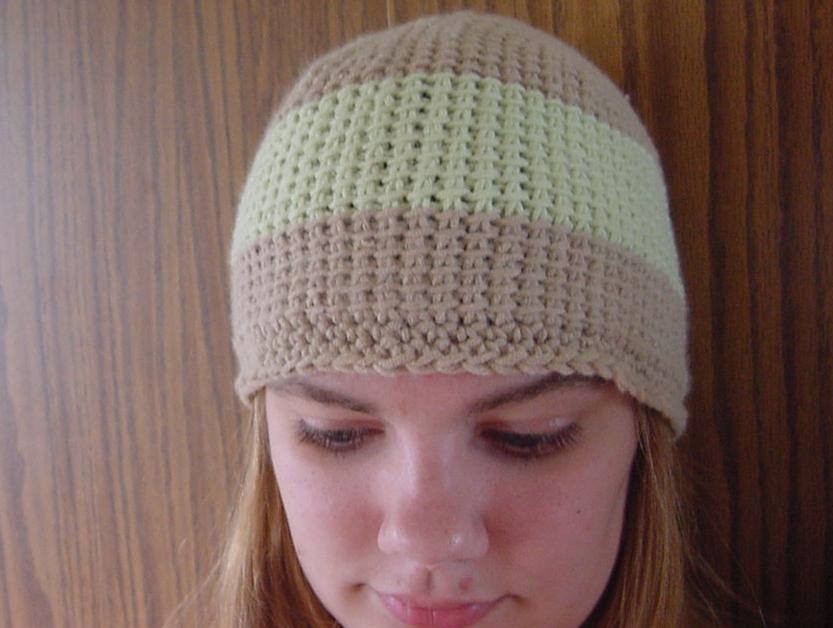 This hat has 3 rows of sc around the brim because i messed up and made it too short. But I love it with the border.
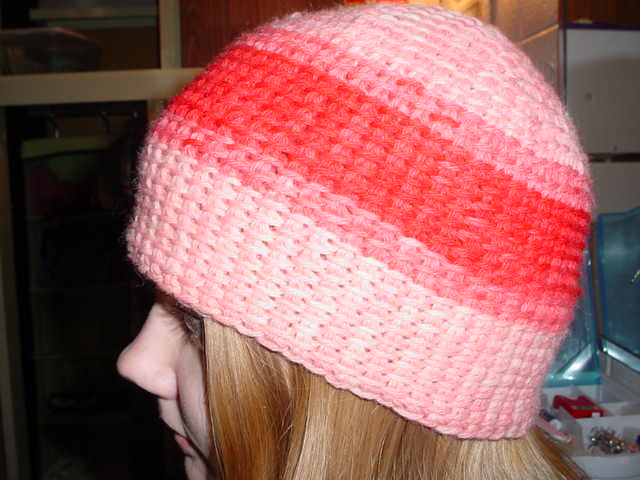
This one is completely BAS made with Lionbrand Fisherman's Wool I died myself with kool-aid.
Materials: Size J Afghan hook. Note: if you do not have a afghan hook, this project can be worked using a normal crochet hook by putting a rubber band on the end of your hook to keep the stitches from sliding off.
Worsted weight yarn
Yarn needle
Tape measure
Size: Fits adult women’s head. See variations at the bottom for tips on making the hat bigger/smaller
Gague: not important as long as the first row is 9 inches (for adult size)
Notes: Hat is worked with vertical rows.
Abbreviations: BAS basic afghan stitch
Chain 31
Row 1: Starting in the 2nd ch from hook, work a row of BAS (Forward: draw up a loop in each st across Back: yo draw through1 lp, *yarn over, draw through 2 lps repeat from * across). (31 sts)
Row 2: work a row of BAS but leave the last stitch unworked. (30sts)
Row 3: work a row of BAS but leave the last stitch unworked. (29sts)
Row 4: work a row of BAS but leave the last stitch unworked. (28sts)
Row 5: work a row of BAS but leave the last stitch unworked. (27sts)
Row 6: work a row of BAS but leave the last stitch unworked. (26sts)
Row 7: work a row of BAS but leave the last stitch unworked. (25sts)
Row 8: work a row of BAS but leave the last stitch unworked. (24sts)
Row 9: work a row of BAS but leave the last stitch unworked. (23sts)
Row 10: work a row of BAS but leave the last stitch unworked. (22sts)
Row 11: work a row of BAS but leave the last stitch unworked. (21sts)
Row 12: work a row of BAS but leave the last stitch unworked. (20sts)
Row 13: work a row of BAS but leave the last stitch unworked. (19sts)
Row 14: Forward: work till end of row13(19sts) then drop down to row 12 and draw up a loop in the unworked stitch, drop down to row 11 and draw up a loop in the unworked st, drop down to row 10 and draw up a loop in the unworked sts. Continue until you draw up loop in all unworked stitches (31 loops on hook) Back: yo draw through 1 lp, yo draw through 2 loops across.(31 sts)
Repeat rows 2-14 5 times or until hat fits around head. You can stop on any row as long as you finish with a full row of 31 as in row 14.
Finishing: whipstitch the two short sides together and then drawstring the top to close.
Oops: if your hat is too short then join yarn onto brim of hat by the seam and work sc in the round until it is long enough.
Variations
Different sizes: this pattern can very easily be adjusted for any size head. Measure their head or an existing hat from top to forehead and make however many sts to make your first row that length. Fyi: do not measure the chain, it will be longer than your first row. Then just make it until it fits around the head.
Stripes: to work horizontal stripes, do not carry yarn across more than 3 sts. If you alternate colors, it will be a lot easier to have separate balls for each stripe. I would recommend only doing stripes on the lower part of the hat because it gets weird if you continue into the decreasing part.
For help coming up with striping patterns, I use this random stripe generator.
Pictures: it is very easy to work a picture into this hat. As long as the chart you are working from is no longer than your shortest row. Don’t carry colors more than 3 sts!!!
posted by Becky @ 3:02 PM
15 comments
![]()
![]()

